We all know that school buildings and asbestos don’t mix. In order to protect students and school employees from asbestos exposure, the United States Environmental Protection Agency (EPA) has distinct regulatory requirements for public and non-profit private schools.
If asbestos is found, schools must do their part to control fiber release from asbestos-containing building materials, such as Vinyl Asbestos Tile (VAT). This can be done by encapsulation, encasement or removal—also known as asbestos abatement. It should be noted that asbestos removal or abatement is not usually necessary unless the material is severely damaged or will be disturbed by a building demolition or renovation project. A much more popular and cost effective method is asbestos encapsulation, which essentially seals the asbestos within a protective shell.
Roy W Brown Middle School in Bergenfield, New Jersey opted for the encapsulation method when recently addressing their asbestos flooring situation. Turning to the experts at Mathusek, they learned that properly encapsulating or sealing asbestos is the most effective method for preventing asbestos contamination because it binds the fibers together. As long as the original tiles are intact, there’s no health danger in using this method.
Mathusek recommended encapsulation with Herculan IG from Action Floor Systems—a safe, economical, and effective choice that could be installed in just a few days and be ready for use soon after. This 100% water-based, odor-free, and environmentally friendly flooring has a nontoxic top coat that’s free of volatile organic compounds (VOCs)—which means it can be installed year-round without the need to open windows or evacuate the facility.
Here is a step-by-step look at Mathusek’s asbestos encapsulation job at Roy W Brown Middle School, starting with a “before” shot of Vinyl Asbestos Tile (VAT).
Before
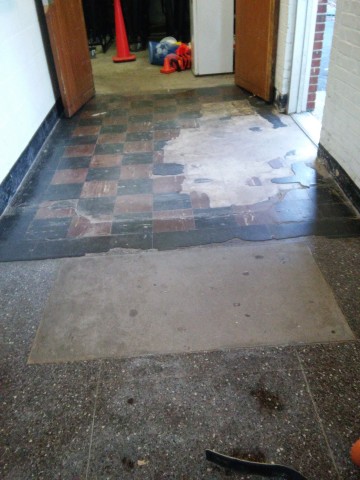
Step 1 (no photo) – Prepare
Prepare the old sealed concrete floor. This involves a simple, quick screening and tacking to remove dust.
Step 2 – Base Resin
Apply the base resin, using a trowel.
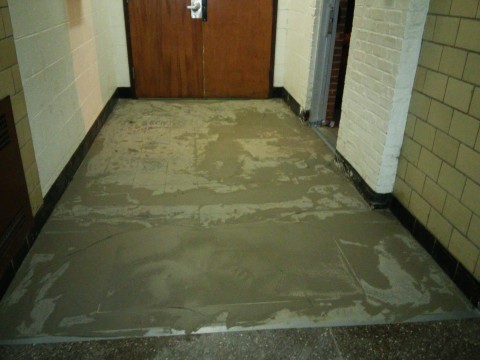
Step 3 – Apply Chips
While still wet, apply the broadcast chips by hand until complete coverage is achieved. This involves scrapping and/or buffing the chips with an abrasive disk to achieve texture and smoothness.
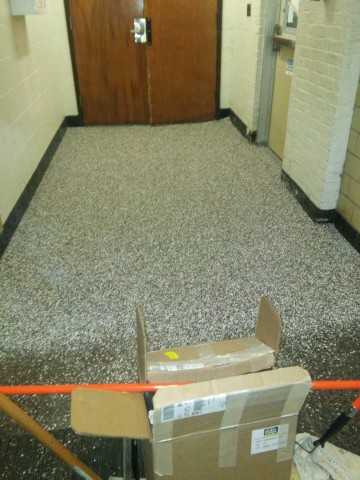
Day one of multipurpose flooring install is complete. Next steps involve clear coat application.
Step 4 – First Clear Coat.
Apply the first layer of clear coat, starting around the perimeter and working inwards.
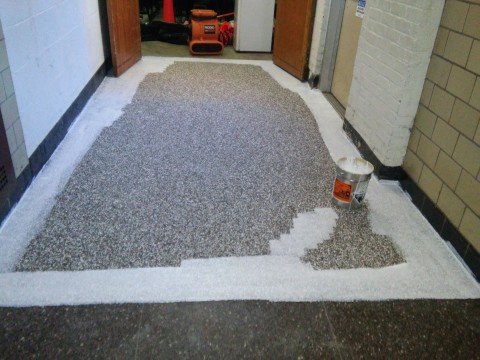
This layer will go on milky white and dry clear.
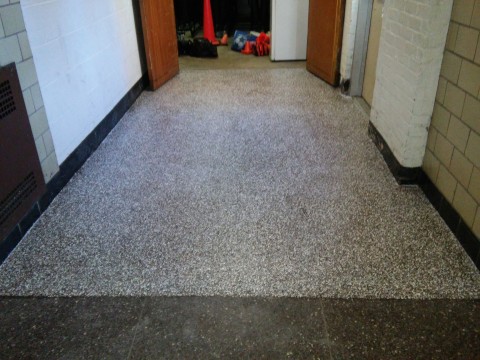
Step 5 – Second Clear Coat
Apply the second layer of clear coat, 3 to 5 hours later.
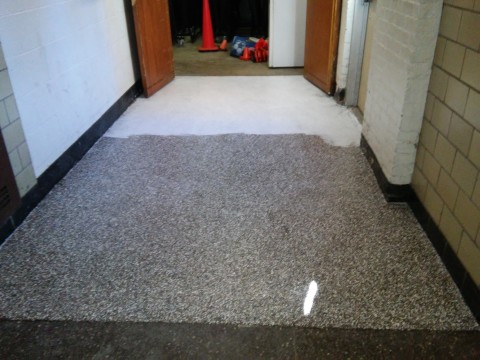
Step 6 – Optional Final Clear Coat
Apply an additional layer of clear coat if a smoother finish is desired.
The floor is left to dry overnight. It’s ready for foot traffic the next day. And its ready for equipment to be rolled in three days later. That’s it!
Questions about asbestos encapsulation with Herculan IG? Contact Mathusek or call 1-201-405-0004.
FLOORING. PROBLEMS. SOLVED.